Tuesday, April 16, 2013
{Baby Shower Gift: Bunting Quilt}
A special arrival deserves a special gift. I tried my hand at quilting and I had SO much fun. Albeit without some of the tools which would have made it somewhat easier (i.e. a walking foot). Hopefully I can acquire one soon before my second quilt attempt.
Thursday, March 7, 2013
{The Fairy Is Coming : Part 2}
I have an ever growing stash of fabric, bits and bobs. So, "shopping the stash" wasn't a challenge. I even had an old pillow insert left over after a cushion cover ripped. I cut it open and used the batting to stuff the little creature.
Its not my best sewing attempt, I didn't even change my thread over to green to match the fabric, but my 6 year old loves it and it was more just a trial run to put what was in my mind into reality.
There is a cute little mouth sewn into the cute monster that doubles as a pocket for the tooth and money.
I am not 100% happy with it, and think I might try another kind of design just to mix it up.
Q: How does your house celebrate the tooth fairy? Glass of water? Under the sleeping pillow? In a special place?
Lauren x
Wednesday, December 5, 2012
{Extra Special Twinkle Lights}
Materials:
- 1 length of Christmas lights.
- 3m of stiff tulle in your choice of colours (I chose red and white). I got mine for about $2 per meter.
- Craft scissors.
Wednesday, October 10, 2012
{Confessions of a Handbag Pt 2}
The first step was a cute kids fabric that contains my kids stuff that lives in my bag. Now that we are out of baby stages of life, it's mostly 'distraction items' as you can see in part 1 (link above).
Part 2:
I have one large pink bag. This is all MY stuff and I can also fit my phone & iPad in here and therefore can lift this ONE pouch out and change handbags at a moments notice and do so very easily.
The small one usually lives inside the larger bag, to make it easier.
The larger bag has a whole lot of stuff from Panadol, pens, band aids, a notepad, safety pins, usually my iPad, tic tacs etc...
The little red pouch at front centre holds all my shopping trolley tokens. I always keep a spare arm band in there for shopping trips to turn my phone into a toddler taming device :
The smaller bag is my girly bag. General essentials from my moxie tins, lip glosses, elastics, bobby pins, mirror and nail file.
Is your handbag organised? Or does it look like a shamozzled mess of randomness that could possibly produce a science experiment?
Mine was bordering on the latter before these bags...it's great knowing where everything is meant to be and being able to find stuff at a seconds notice.
Lauren x
Tuesday, October 9, 2012
{I love you because}
However, i loved the chevron pattern i found on this one {here} and it was a FREE printable. There are also different colour schemes available to choose from. Just mount the frame somewhere you both see it with a whiteboard marker (normal sharpies don't work without windex or elbow grease - hint hint)!
I had all the things for this at home except for the whiteboard marker which set me back a whopping $3! Great value!
I love that this provides a cute opportunity to share things you love about your other half and It may even help you to look more intentionally for things if this doesn't come natural to you. I find that it's important to appreciate the small things in life - one day you will realise they were in fact the big things!
Lauren x
Tuesday, April 24, 2012
{The Powerhouse Pt 2: Love Lace}
Friday, March 30, 2012
{Easter's a comin'!}
I have not really done many decorations For Easter in the past, but this year I couldn't resist. It all started with inspiration from this beautiful wreath.
So, here are a few things around our house that help to add the 'festive cheer' of this very special and significant calendar date.
Monday, November 28, 2011
{Making BIG Boy Rooms}
My little brother (who moved in with us earlier in the year) started a working holiday journey in UK (tear tear)!
Since we gave him Joshys room for a few months, him leaving meant I got to re-do the room suitable for a little (ok BIG) boy.
We decided to get bunk beds for him and give his 'car bed' to his 2 year old lil bro (who often snuck into that bed anyway he loved it so much).
So since we were boy-ing up the two rooms....insert sad moment # 2.
Collapsing the cot and moving that and the change table out for good. Wow that was teary....there has been a little body sleeping there for the last almost 6 years! I have found a way to do something special with that, and will show you pics when ready (yay!)
In the mean time here are some little touches we added to the boys rooms to make it more personal and boyish.
Enlisting the help of Joshy to paint the initial letters (spotlight for about $3).
The 'famous' bunk beds that we searched around for - thanks eBay! LOVED the doonas I found at target too.
The finished J with my attempt at doing one of those birth detail art works!
A world and Aussie map with destinations we have been too, where Uncle PJ lives etc.... Lots of flags wanted to be added here too!
No more cot 'little man' - hello big boy car bed (although you really can't see the car here).
And little Daniels initial and birth art too!
I had do much fun shopping around for doonas, maps and creating the art for their room. I'm almost finished....a few more touches and we will be done 100%. I would like to somehow incorporate a photo of them
and the meanings of their names into a frame....working on that one.
I can't wait to show you the other project I'm working on too....all in good time!
Lauren x
- Posted using BlogPress from my iPhone
Thursday, November 10, 2011
{Lavender & Oatmeal Eye Mask}
She mentioned a while back she loved using the bean bags I had made for my youngest sons birthday gift to his guests (instead of lolly bags) on her eyes.
So I knew I wanted to make her an eye mask that you could heat or cool. Oatmeal and lavender just sounded so relaxing and soothing.
Need:
- 2 contrasting fabrics (I could have fit MANY on a fat quarter)
- Template (I just hand drew one to fit my eyes and added a seam allowance)
- Machine
- Thread
- Oats (about 1 cup - didn't really measure)
- 5 stalks of lavender dried (could use essential too)
- Scissors
- Texta or washable marker
1. Cut out a template to fit and add seam allowance.
2. Measure out onto fabric and cut out. Sew wrong sides together Leaving a gap to turn out (back stitch for strength).
3. Cut a few Triangles around edge to make sure material sits nicely and doesn't bunch. I go around and cut one side of each triangle so scissors stay at same angle and then swap (more efficient and less finicky).
4. Turn inside out, I usually use a chopstick or a pen top.
5. Iron flat:
6. Stuff full of your filling in this case the oatmeal and lavender. Make sure you leave a little room for seeing the gap and the filling to sit nicely on the face.
You can use anything for the main filler like rice, barley or cherry pits.
Any scents could include Rose petals, spices, essential oils, cinnamon, rosemary, crushed mint etc....
7. Sew up the gap and voila!
Make sure you include instructions:
To cool - Place in freezer and place on eyes once cool enough for comfort.
To heat - Place in microwave with a glass of water on turntable also, for about 1-3 minutes (depending on microwave power) and don't ever leave unattended.
I hope you enjoy this idea. It was so easy I think I might do one for me now!
Lauren x
Posted using BlogPress from my iPhone
Tuesday, October 11, 2011
{Menu Chalkboard}
A few months ago I went to the treasure shop with my boys and I bought a frame that I wanted to re-use. The frame cost me a few dollars.
I saw potential in this discarded old thing.
With a little bit of black board paint left over from another project and some bright red cherry paint on the frame, I made this board to put up the menu for the week. It sure beats the handwritten paper on the fridge. My family love knowing hats coming up too!
Enjoy;
Lauren x
Wednesday, October 5, 2011
{Bib and Nappy Mat/ Storage Wallet}
I had some beautiful girls fabric I bought previously and I wanted to use it for this project.
So I made a bib and a nappy change mat with storage compartments for her. Nothing like practical and pretty! I love this idea so much and would make one for me if I wasn't about to head out of nappies (YAY!!!)
The teddy is the closest thing I have to a doll in a boy house to show you how the mat works and how the bib sits.
This 'crinkley' heart is stuffed with a cellophane type material and built in so that the baby has something to play with whilst Mummy is trying to wrangle a new nappy onto a little bubba.Both projects were manageable even for a beginner.
Bib
1. Trace a bib pattern from one or there are a few online you can find if you don't have one on hand.
2. Pin right sides together.
3. Make sure you place the string/ ribbon to tie it up inside the bib, leaving a little out to anchor it and the length inside. You can also use velcro after you've turned it instead.
4. Sew around the edge leaving a little gap (back stitched) to turn inside.
5. Turn out the right way and top stitch around the edge making sure you enclose the gap you left to turn it out.
Nappy Mat
1. Measure out your two rectangles
2. Sew face side of fabric together with a gap on the side (back stitched) to turn right side out.
3. Iron flat
4. Measure size of pocket and fold and pin in place. Top stitch around edge using a decorative stitch (don't forget to put the ribbon and toy in the pocket fold if doing so).
5. Sew a divider in the center of the pocket for nappy and wipes case.
6. Sew a ribbon, some velcro or something to fasten and hold together.
Enjoy,
Lauren x
p.s. I hope you like the new blog logo! I have felt like a change for a while but waited for the right idea. I loved the toffee apple as it is a mix of healthy and sweet. We eat healthy here, but as someone who enjoys baking, treats are a fun thing to enjoy.
Thursday, August 25, 2011
{Christmas 4 month countdown}
I like organisation.
I like order.
I like planing.
I am a list queeen!
So i have lists going on ages before the 25th of December. Lists of gifts, menus, shopping lists, time line to-do lists, lists for anything! So, yesterday as the 4 month mark arrived, I found some pretties online and swooned for a while.
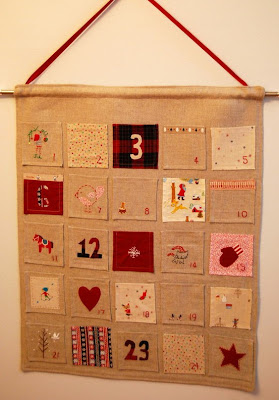
In my 12 days of Christmas countdown last year I dedicated a post to the beautiful advent calendar.
I have been re-inspired from Pinterest and with 4 months to go until Christmas I have plenty of time to plan ahead and make one for us this year. Now to decide on the design. I want to do it in fabric so that it is something that will last and I can pass on. This is just the tip of the iceberg though....there are so many homemade Christmas decorations I want to do this year, better get planning ;)
I would love to know if you created an advent calendar idea at your place and what kind of design you have, please link it up in the comments or on the facebook page if you have ;)
Lauren x
Thursday, August 18, 2011
{Stuck for a Crafty Idea?}
I was wasting time....er....browsing on pinterest tonight and I stumbled upon a pic that linked to a blog post "Adventures in home-making : the worlds best sewing tutorials in no particular order".
If you are a crafter, love sewing like I do and are seeking inspiration, here are TONNES!!! Not that I need more projects to start as I have many on the drawing board/ back burner.....but I know I will refer to this in the near future!
Enjoy wasting time...I mean dreaming! ;)
Lauren x
Monday, August 8, 2011
{Guest Blogger from PLAID : Pinwheel Tutorial}
Thanks Lauren for having me here today at your fantastic blog!
I have been reminded recently of how beautiful and sweet pinwheels are. So, I decided to make a few and see what could be done with them. After seeing how easy they are to make I have decided that they will be the theme for my daughter's birthday party in October.
So, let's get to it...
To make a pinwheel you need the following supplies...
- scrap fabric
- fusible webbing
- iron
- fabric scissors
- hot glue gun or other glue
- bamboo skewer
If you’d like to put your pinwheel onto a card then you’ll also need...
1. Grab your fabric scraps and fusible webbing cut out 5cm squares of all
2. Fuse the webbing onto the wrong side of one of the fabrics, wait for it to cool, peel off the paper backing and fuse it to the wrong side of the second fabric. Trim away any frayed edges and you will be left with this...
3. Cut 4 slits in the square starting from each point on the square. This doesn't have to be too exact, just make sure there is a section in the centre of the square in-tact.
4. Trim away a small section of the corners. This will make sure the centre of your pinwheel is neat.
5. Get your glue gun and place a dot of glue in the centre. Take one of the trimmed corners and glue to the centre of the square. Repeat this for all 4 trimmed corners using a dab of glue each time.
6. Cut off a section of the bamboo skewer and glue it to the back of the pinwheel. You can finish the pinwheel off with a cute button.
7. Now get some matching cardstock out and embelish / cut / stamp away until your happy, then glue the pinwheel on. I have used tombow craft glue to attach the pinwheel.
Ta Da!!! One very cute pinwheel card...
Now go forth and make pinwheels :)
Thanks again Lauren for having me here today!
Your welcome Kerryn. Thanks for sharing that gorgeus pinwheel tutorial! I am definintley going to try some soon ;)
Tuesday, July 26, 2011
{Pretty Yoga Mat Bag}
So now, when I go to workout, I have a very pretty way to carry my yoga mat. Love it!
I didn't have a pattern, just kind of 'winged it' but it was super easy and finished it in under an hour from first cut! If you can sew a straight line, you can do this for sure ;)
Enjoy;
Lauren x
Posted using BlogPress from my iPhone
Friday, July 15, 2011
{A Nap Time Sewing Project} Handbag for a princess
So, I had some fabric laying around and wanted to make her something special. I have been looking for a nice handbag pattern for ages and when I found this one, I just knew it would turn the fabric into a perfect gift for his little 'girl' friend.
I first stumbled on Made By Rae when she started a theme on her blog called "Celebrate the Boy"....as a sometimes crafty Mum of two boys, I was very interested! So I printed off her pattern for this Buttercup Bag and started cutting. It was a very easy pattern to follow and the steps and diagrams make this very easy! Here are some photos of the finished project. I also bought some more fabric today so I can re-make it for me ;)


Enjoy;
Lauren x
Thursday, June 30, 2011
{Veeeery Pinteresting}
I have a few new things to share soon, but I want to share something very cool with you tonight.
I have found two new outlets for creative sharing. One of them is the Instagram Ap on my phone that I have been using on my iPhone for a while now.
But the best new thing (that I am slightly addicted to) is Pinterest. It has rocked my world and sent me on inspiration overload!!! Think of it as a 'virtual cork board' that you pin photos on. You can see what other people pin on their boards and everyone labels their boards into categories. You will find eye candy for everything you can imagine. Here are a few of the things i have "re-pinned":
Ideas for kids crafts, activities and teaching ideas
Plenty of organisational ideas for OCD people like me who love order ;)
'apple' cupcakesI appologise for introducing you to this because there are many hours you can waste dreaming and laughing on here!
Enjoy;
Lauren


