Wednesday, October 5, 2011

{Bib and Nappy Mat/ Storage Wallet}

My beautiful cousin (in-law) is expecting a beautiful baby girl in a few weeks. I am very excited for her and now that I have given the gift to her in person, I can share it on here.

I had some beautiful girls fabric I bought previously and I wanted to use it for this project.

So I made a bib and a nappy change mat with storage compartments for her. Nothing like practical and pretty! I love this idea so much and would make one for me if I wasn't about to head out of nappies (YAY!!!)


The teddy is the closest thing I have to a doll in a boy house to show you how the mat works and how the bib sits.


This 'crinkley' heart is stuffed with a cellophane type material and built in so that the baby has something to play with whilst Mummy is trying to wrangle a new nappy onto a little bubba.


I took these photos before I attached the tie on the end and so that is missing on here.


Both projects were manageable even for a beginner.

Bib
1. Trace a bib pattern from one or there are a few online you can find if you don't have one on hand.
2. Pin right sides together.
3. Make sure you place the string/ ribbon to tie it up inside the bib, leaving a little out to anchor it and the length inside. You can also use velcro after you've turned it instead.
4. Sew around the edge leaving a little gap (back stitched) to turn inside.
5. Turn out the right way and top stitch around the edge making sure you enclose the gap you left to turn it out.


Nappy Mat
1. Measure out your two rectangles
2. Sew face side of fabric together with a gap on the side (back stitched) to turn right side out.
3. Iron flat
4. Measure size of pocket and fold and pin in place. Top stitch around edge using a decorative stitch (don't forget to put the ribbon and toy in the pocket fold if doing so).
5. Sew a divider in the center of the pocket for nappy and wipes case.
6. Sew a ribbon, some velcro or something to fasten and hold together.

Enjoy,
Lauren x

p.s. I hope you like the new blog logo! I have felt like a change for a while but waited for the right idea. I loved the toffee apple as it is a mix of healthy and sweet. We eat healthy here, but as someone who enjoys baking, treats are a fun thing to enjoy.

Tuesday, October 4, 2011

{Birthday Card with a Difference : what an egg-cellent idea}

Recently a special girl in my world had a birthday. I saw an idea sometime ago (yes, on pinterest) and wanted to give it a go. It cost me nothing as I had everything on hand and it was stacks of fun.
I didn't get photos of the glueing and glittering process as my hands were messy and I was enjoying it so much I just forgot. I hope you get the idea though.


All you do is find an egg, a skewer, medicine or egg cup, paint, pva glue, tissue paper, glitter (the finer the better) and a paint brush.

1. Carefully put a hole in each end of egg. Scramble egg inside with skewer and slowly drain egg. I blew some out and let some drain into medicine cup. This takes a while. (I saved the egg and made a cake for morning tea - no waste here!)
2. Then I rinsed it with water and set overnight to dry.
3. Write your message on paper and finely roll. Slot it into the hole. I found making one hole a little larger helped here and with the draining process.
4. Using the pva glue and small squares of tissue (colour doesn't matter) cover up the holes on each end and smooth out the paper with more glue on top (like a decoupage technique).
5. Paint the egg a background colour. This you'll have to do in two steps. (this isn't absolutely necessary, but in my practice run I found that it helped the finished look in case you miss a teeny spot with glitter).
6. Cover with glitter one half at a time.

Voila!

I packaged this by cutting a section from an egg carton and laying raffia type 'straw' in the bottom. I then placed the egg on top and wrapped in clear cellophane. Attached was a tag "smash me". I had intended to box it up and post it to her, but I got to see her crack it in person which was a lovely surprise!

I hope you like the idea and I can see it being adapted for other messages too.


Lauren x

Tuesday, September 27, 2011

{The 1 minute Smoothie : Healthy, quick and delicious}


I created this quick breakfast idea and the family LOVE it. This is a great idea to add to spring/ summer for breakfasts or on the go smoothies at any time.

I set up a bunch of small snap lock bags. In each bag I put the following:


- 4 strawberries
- A spoonful of blueberries  
- 1 dessert spoon of oats

- 1/2 banana cut up into pieces
- 2 spoonfuls of your preferred yoghurt (I use natural yoghurt)

- Splash of vanilla
- Sprinkle of cinnamon 
- a squeeze of honey
- a sprinkling of flax seeds and chia seeds


Zip up the bags and pop into the freezer. That's the hard part! 


Then, each morning, I just take a zip lock bag out and add it into my magic bullet blender thing, fill it with milk and blitz.  

[You could also use a blender, but that's why i love the magic bullet because you have to wash far less dishes!]

SOOOO easy! And because it's all frozen, it turns into a sort of a smoothie frappe. VOILA!!!

You can also try this with any fruit/ yoghurt combinations you have on hand.
Other ideas to add to the bag might be:
- passion fruit pulp
- tinned fruit

- flavoured yoghurts
- fruit puree's frozen into cubes like the yoghurt concept

- blueberries

- paw paw
- kiwifruit
- a sprinkle of cinnamon
- mangoes


.........let your imagination take over and create!!!


Enjoy;


Lauren x

Sunday, September 25, 2011

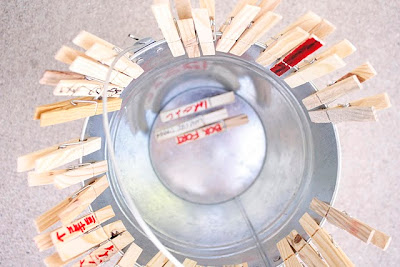
{School Holidays "Muuuuum I'm Bored"}

Well, school holidays are upon us in Sydney. Here are a few fun ways I have found to help beat the boredom. The best bit is, that you can create the ideas on your own or with the kids, but when you hear the (somewhat inevitable) "Muuuuuum I'm bored"... they go and choose something themselves to do. This teaches them to learn to regulate their own boredom and manage their own time.


Deliah creates the bucket list


I hope you enjoy your holidays and would love to hear how you deal with the holiday activities and boredom!

Lauren x


{Toddler / Pre-schoolers Quiet Book}

I was browsing on pinterest the other day and came across a few quiet book ideas for toddler/ preschoolers. Most of them were hand sewn and beautiful. I was in craft heaven!

However, with a family lunch on later that day, i didn't have much time. So I came up with this in the morning (nothing like leaving yourself a few hours to complete a project).
Armed with my mac book, a laminator and some blue-tak (will replace with velcro dots asap) I got to work.
I would format it properly if i gave myself more than 20 mins to design the pages.

So, here is what I came up with on the rush and it was SUCH a hit for my VERY busy and inquisitive 2 year old. The beauty is you can just add pages as you want to and personalise as interests and skills grow and change.


The cars being different colours and sizes makes a great talking and learning point "Show me the yellow cars" "where are the big cars?" "can you show me the little red car?"


The colours are printed on the page and cut out and laminated also, it helps the little ones know where to put them.


I hope you enjoyed this idea and I now have an order for a 5 year old in the house!

Lauren x

LinkWithin

Related Posts with Thumbnails